
Decontaminating your property from canine parvovirus is a systematic biosecurity operation, not a waiting game; the virus can survive for over a year, but time alone does not guarantee safety.
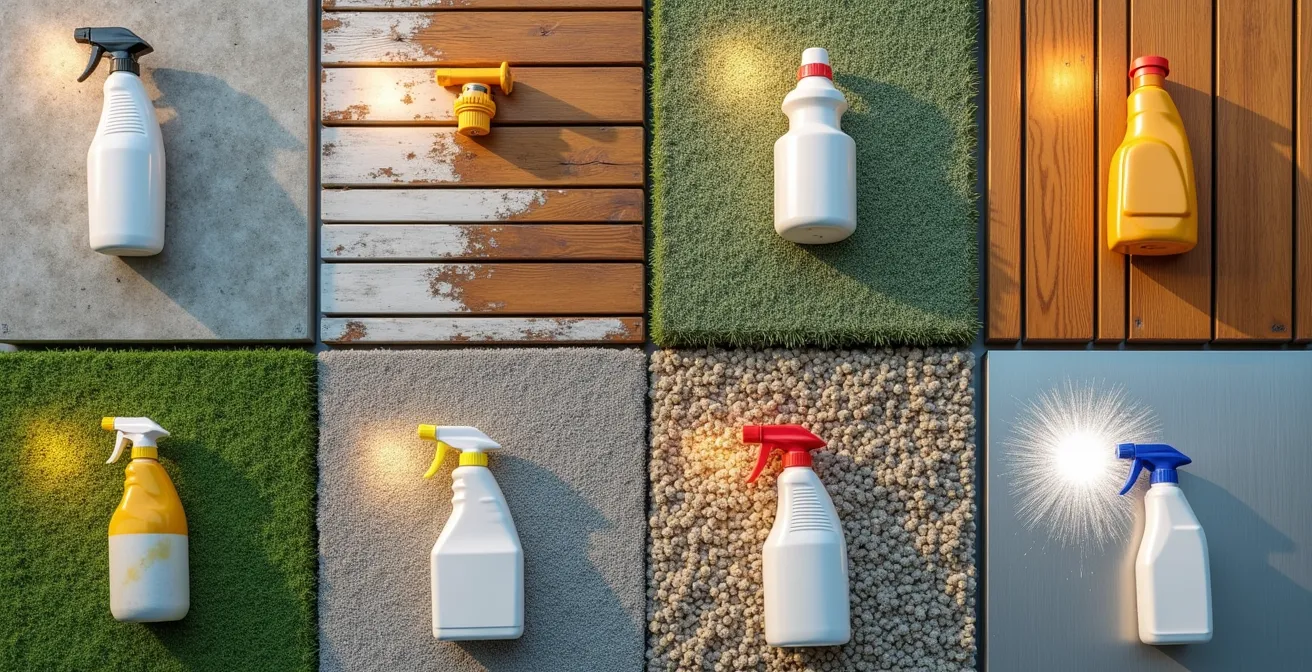
- Only specific virucides, like a 1:32 bleach solution or accelerated hydrogen peroxide with a 10-minute wet contact time, are effective. Standard cleaners like Lysol are useless.
- The greatest risk of re-infection comes from fomites—inanimate objects like shoes, clothing, and car tires that carry the virus from contaminated areas into “safe” zones.
Recommendation: To truly eradicate the threat, you must establish and enforce a multi-zone biosecurity protocol that treats your property like a clean room, meticulously decontaminating all potential contaminant vectors.
The question of how long parvovirus persists in an environment is a source of profound anxiety for any dog owner or breeder who has faced this devastating disease. After the emotional and financial toll of an infection, the lingering fear that your own home remains a threat to a future puppy is a heavy burden. Many sources offer a simple, yet unsettling, answer: wait a year, and the threat will fade. This advice, while partially true, is dangerously incomplete. It fosters a passive approach to a problem that demands active, aggressive intervention.
Treating parvovirus decontamination as a simple cleaning task is the most common and critical mistake. The reality is that canine parvovirus (CPV-2) is a non-enveloped virus, making it one of the most resilient and difficult-to-neutralize pathogens in a residential setting. It doesn’t just “die off” predictably; it withstands freezing temperatures, सामान्य cleaning agents, and the passage of time. Eradicating it requires adopting the mindset of a decontamination specialist. This is not about housekeeping; it is about forensic-level biosecurity.
This guide abandons platitudes and provides a systematic protocol. We will not just discuss timelines; we will detail the specific virucides that work and those that fail. We will map the invisible pathways—the fomites like shoes and tires—that transport the virus. We will outline the critical differences in treatment protocols, the precise timeline for safe socialization, and the often-misunderstood nuances of vaccination. By the end, you will have a comprehensive biosecurity blueprint to reclaim your environment and ensure it is certifiably safe for the arrival of a new, vulnerable puppy.
This article provides a complete protocol for understanding and eliminating the parvovirus threat from your property. The following summary outlines the key stages of this biosecurity operation, from identifying the initial threat to implementing comprehensive prevention strategies.
Summary: How Long Does Parvo Live in Your Yard After an Infection?
- Lethargy and Smell: The 2 Signs That Require Immediate ER Admission
- Bleach vs. Lysol: What Actually Kills Parvovirus on Surfaces?
- Hospitalization vs. Outpatient: Can You Treat Parvo at Home?
- Shoes and Tires: How You Walk the Virus Into Your House?
- When Is It Safe to Socialize a Puppy Recovered from Parvo?
- Vacuuming Strategy: How to Remove 50% of Larvae from Carpets?
- The $200 Prevention that Saves a $3000 Parvo Treatment
- Distemper and Adenovirus: Why These “Invisible” Diseases Still Kill?
Lethargy and Smell: The 2 Signs That Require Immediate ER Admission
Recognizing the earliest signs of canine parvovirus is critical, as the disease progresses with alarming speed. While vomiting and diarrhea are well-known symptoms, two indicators in particular signal a severe, life-threatening crisis that demands immediate emergency veterinary intervention: profound lethargy and a distinct, metallic smell. An infected dog will shed the virus in its feces within 4–5 days of exposure, often before clinical signs even develop. This pre-symptomatic shedding means a puppy can heavily contaminate the environment before you are aware it is sick, making rapid identification paramount once symptoms appear.
The lethargy associated with parvo is not simple tiredness; it is a rapid, multi-stage collapse of the puppy’s energy systems. It progresses from mild listlessness to a state of complete non-responsiveness over 48-72 hours. The second key sign is the unmistakable odor of the diarrhea. Due to the virus attacking the intestinal lining, it causes severe hemorrhaging. This results in a uniquely foul, metallic, or blood-like smell that is distinct from normal gastrointestinal upset. When you observe profound lethargy combined with this specific odor, you are in a critical window where mortality risk is highest. Do not wait for a scheduled appointment; this is a true medical emergency.
Understanding the timeline of this progression is key to recognizing the severity of the situation. The lethargy advances through clear stages:
- Stage 1 (0-24 hours): The puppy shows mild tiredness and reduced playfulness, preferring to sleep over engaging in normal activities.
- Stage 2 (24-48 hours): The lethargy becomes severe. The puppy may be unable to stand for extended periods, refuse to walk, and will have lost its appetite completely.
- Stage 3 (48-72 hours): This is the critical stage. The puppy enters a non-responsive state, often unable to even lift its head. Survival is heavily dependent on immediate and aggressive supportive care.
Recognizing these two signs—the specific quality of the lethargy and the characteristic smell of the stool—is not just about diagnosis; it’s about activating an emergency protocol to save the puppy’s life and begin containment of a highly contagious pathogen.
Bleach vs. Lysol: What Actually Kills Parvovirus on Surfaces?
Once an environment is contaminated, the single most critical task is to neutralize the virus. This is where most well-intentioned cleaning efforts fail catastrophically. Canine parvovirus is a non-enveloped virus, a structure that makes it impervious to most common household disinfectants, including products containing quaternary ammonium compounds like standard Lysol or Clorox wipes. Using the wrong agent provides a false sense of security while leaving the virus completely viable.
Only a select few chemical agents are proven to destroy CPV-2. The gold standard for non-porous surfaces remains sodium hypochlorite (household bleach), diluted to a 1:32 ratio (1/2 cup of bleach per gallon of water). However, its effectiveness is conditional. It requires a wet contact time of at least 10 minutes to work, is rapidly inactivated by organic material (like feces or dirt), and can be corrosive to many surfaces. For areas where bleach is unsuitable, such as fabrics or certain metals, products based on accelerated hydrogen peroxide (AHP) or potassium peroxymonosulfate are highly effective alternatives. These are often more expensive but offer broader surface compatibility and can be more effective in the presence of small amounts of organic matter.
The choice of disinfectant must be tailored to the specific surface being treated, as a one-size-fits-all approach is doomed to fail. Hard, non-porous surfaces like sealed concrete, tile, and metal bowls can be effectively treated with a bleach solution, provided they are pre-cleaned of all organic debris. Porous and semi-porous materials like wood, fabric, and especially soil and grass present a much greater challenge, as the virus can be shielded from chemical contact.
This table from a Massachusetts government public health document outlines the effectiveness of various disinfectant classes against the virus, highlighting the critical failures of common cleaners.
| Disinfectant Type | Effectiveness | Contact Time | Safe Surfaces | Limitations |
|---|---|---|---|---|
| Bleach (1:32 dilution) | Highly effective | 10 minutes | Hard non-porous surfaces | Corrosive, respiratory irritant, ineffective on organic matter |
| Accelerated Hydrogen Peroxide | Highly effective | 10 minutes | Most surfaces including fabrics | More expensive than bleach |
| Potassium Peroxymonosulfate | Effective even with organic matter | 10 minutes | Carpets, yards, multiple surfaces | Can be irritating to skin and eyes |
| Regular Lysol/Quaternary Ammonium | NOT effective | N/A | N/A | Does not kill parvovirus |
Ultimately, successful surface decontamination is a matter of chemistry and protocol. Understanding which agents are effective and adhering strictly to their required contact times is the only way to break the chain of infection.
Hospitalization vs. Outpatient: Can You Treat Parvo at Home?
When a puppy is diagnosed with parvovirus, the immediate question is the plan of attack. The gold standard for treatment has always been aggressive inpatient hospitalization, involving intravenous (IV) fluids, constant monitoring, and a host of supportive medications. This approach offers the highest chance of survival but comes with a significant financial cost, often running into thousands of dollars. This has led to the development of outpatient protocols, most notably the “Colorado Protocol,” which offers a viable alternative for owners who are unable to pursue hospitalization but are committed to intensive home care.
A key study on the outpatient protocol at Colorado State University provided critical data on its efficacy. The study demonstrated that while hospitalization remains superior, the home-based protocol is far from a futile effort. It found that 80 percent of puppies treated with the outpatient protocol survived, compared to a 90 percent survival rate for those receiving traditional in-hospital care. This 10% difference is significant, but it also proves that with extreme dedication, a positive outcome at home is possible. However, the decision to pursue this path cannot be taken lightly; it is a demanding, round-the-clock commitment.
The Colorado Protocol is not simply “giving some pills at home.” It is a rigorous medical regimen that essentially turns the owner’s home into a veterinary nursing station. The requirements are intense and require a high level of owner compliance and comfort with medical procedures.
The core requirements of the home treatment protocol include:
- Administering subcutaneous fluids every 6-8 hours to combat severe dehydration.
- Giving anti-nausea medication (e.g., maropitant) via subcutaneous injection once daily.
- Syringe feeding small amounts of a high-calorie liquid diet every few hours if the puppy is not eating voluntarily.
- Monitoring blood glucose levels and administering Karo syrup orally if they drop, a complication that affects about 75% of puppies.
- Providing potassium supplementation as prescribed, as it is needed in over 60% of cases.
- Maintaining a strict biosecurity and isolation protocol for 4-6 weeks after recovery to prevent further environmental contamination.
Ultimately, the outpatient protocol is a testament to what can be achieved with dedicated home care, but it underscores the severity of the disease and the intensity of the fight. It is a valid option, but only for the most prepared and committed owners.
Shoes and Tires: How You Walk the Virus Into Your House?
The most insidious aspect of parvovirus is its ability to travel. The virus doesn’t just stay in the soil where an infected dog defecated; it hitches a ride on inanimate objects, known as fomites, and is transported into what you believe are safe zones. Your shoes, your car tires, and even delivery packages are all potential vectors for introducing the virus into your home, your car, or a friend’s yard. An understanding that parvovirus can survive in the environment for up to a year outdoors under ideal conditions (shady, moist) is useless if you are actively re-contaminating your “clean” spaces every day.
The core of a successful biosecurity plan is controlling these vectors. This requires creating a physical and procedural barrier between the contaminated world and your safe zones. This is not about casual cleanliness; it’s about establishing a “decontamination airlock” at every entry point to your home. This means all items and people crossing the threshold are subject to a decontamination protocol. The soles of your shoes are the most common culprit. Walking across a contaminated patch of grass and then onto your living room carpet is a primary method of spreading CPV-2.

To combat this, you must implement a strict protocol at your home’s entrance. The goal is to create a clear transition zone where the potential for contamination is intercepted and neutralized before it can infiltrate your home. This is a non-negotiable component of living on a property with a history of parvo.
The “Decontamination Airlock” protocol involves several key stations at your main entry:
- Foot Bath Tray: A shallow tray containing a 1:32 bleach solution. All footwear must be submerged for the required 10-minute contact time before entering the home.
- Contaminated Clothing Bin: A designated, sealed bin for any clothing that may have come into contact with the contaminated environment. These clothes should be laundered separately with bleach if possible.
- Hand Sanitizing Station: A station with soap and water or an alcohol-based hand sanitizer for immediate hand hygiene upon entry.
- Shoe-Changing Zone: A designated area to remove outdoor shoes and switch to indoor-only footwear. Outdoor shoes should never cross the threshold into the main living area.
- Package Cleaning Station: A station to wipe down all incoming packages and deliveries with a virucidal disinfectant before bringing them inside.
By treating every entry point as a biosecurity checkpoint, you shift from passively hoping the virus has died to actively preventing its entry. This is the fundamental difference between a contaminated house and a safe home.
When Is It Safe to Socialize a Puppy Recovered from Parvo?
After the intense battle to save a puppy from parvovirus, there is a natural desire to return to normalcy, including the crucial developmental step of socialization. However, this is a period fraught with risk for other dogs. A puppy that has clinically recovered—meaning it is no longer showing symptoms—is not immediately safe to be around other canines. The concept of viral shedding is paramount here. The puppy will continue to shed infectious viral particles in its feces for a period after it appears healthy, posing a significant threat to unvaccinated or vulnerable dogs.
The consensus among veterinary experts is that a recovered puppy continues to be a source of contamination for some time. According to the American Kennel Club, puppies will continue to shed the virus for up to 10 days after clinical recovery. For this reason, a strict quarantine from all other dogs (except for fully vaccinated, healthy adult dogs within the same household) must be maintained for at least this long. However, a more conservative approach is often warranted, as some research and veterinary opinions suggest this shedding period can last for as long as 3 to 6 weeks. Given the high stakes, erring on the side of caution is the only responsible course of action.
The good news is that this period of risk is finite, and recovery confers powerful, lasting protection for the puppy itself. This point is emphasized by leading veterinary resources. As the Merck Veterinary Manual states:
Dogs that recover develop long-term, possibly lifelong, immunity
– Merck Veterinary Manual, Canine Parvovirus Infection Reference
This lifelong immunity means you do not have to worry about your recovered dog getting parvo again. The focus of the post-recovery quarantine is solely on protecting *other* dogs. The safe window for reintroducing your puppy to the wider canine world should be determined in consultation with your veterinarian, who can provide a recommendation based on the specifics of the case and the prevalence of the virus in your area. A minimum of two weeks post-recovery is a common baseline, but a 4-week quarantine is a safer, more robust biosecurity standard.
Patience during this final phase is the last critical step. It ensures that your puppy’s survival does not inadvertently lead to another dog’s illness, closing the chapter on the infection completely.
Vacuuming Strategy: How to Remove 50% of Larvae from Carpets?
While the query might involve terms like “larvae,” the primary threat embedded in soft surfaces like carpets is not a macroscopic organism but the microscopic and highly resilient canine parvovirus. Carpets represent one of the most significant challenges in a decontamination protocol. Their porous, fibrous nature protects the virus from both physical removal and chemical neutralization, turning them into a long-term reservoir of infection. A simple vacuuming or surface shampooing is insufficient and provides a false sense of security. Eradicating CPV-2 from carpeting requires a hierarchical approach, escalating in intensity based on the level of contamination.
The first and most accessible method is heat. Steam cleaning, when done correctly, can be an effective tool. The key is achieving a surface temperature of at least 212°F (100°C) and maintaining it. This is not always achievable with consumer-grade steam cleaners. For chemical decontamination, you must use a carpet-safe virucide known to be effective against non-enveloped viruses, such as an accelerated hydrogen peroxide or potassium peroxymonosulfate-based cleaner. Bleach is not a viable option for carpets. Even with these tools, complete eradication is not guaranteed.
In cases of heavy contamination, such as a room where an infected puppy was housed, the only way to be 100% certain of safety is the complete removal and disposal of the carpet and underlying padding. This may seem extreme, but it is the definitive biosecurity solution that eliminates all doubt. If you choose this route, the contaminated materials must be handled as hazardous waste to prevent further spread during removal.
Action Plan: Carpet Decontamination Hierarchy
- Level 1 – Thermal Deactivation: Utilize a professional-grade steam cleaner capable of maintaining a surface temperature of at least 212°F (100°C) across the entire carpeted area.
- Level 2 – Chemical Neutralization: Apply a carpet cleaner specifically formulated with accelerated hydrogen peroxide or potassium peroxymonosulfate, ensuring you follow the manufacturer’s instructions for contact time.
- Level 3 – Complete Removal: In cases of direct and severe contamination (e.g., repeated vomiting or diarrhea), the most definitive action is the complete removal of the carpet and padding.
- Level 4 – Disposal Protocol: If removing carpet, seal all contaminated materials in heavy-duty plastic sheeting before transporting them out of the home to prevent cross-contamination.
- Level 5 – Subfloor Disinfection: After carpet removal, the exposed subfloor must be thoroughly cleaned and disinfected with a suitable virucide before any new flooring is installed.
Ultimately, when it comes to carpets, the acceptable level of risk is a personal decision, but from a biosecurity standpoint, anything less than complete removal in a high-contamination zone is a calculated gamble.
The $200 Prevention that Saves a $3000 Parvo Treatment
The entire, exhausting process of decontamination and treatment can be almost entirely avoided. The financial, emotional, and logistical nightmare of a parvovirus infection stands in stark contrast to the simplicity and low cost of prevention. A full series of puppy vaccinations costs a fraction of a parvo treatment. While prices vary, a PetMD analysis highlights the vast difference: a parvo vaccine typically costs between $30 and $50 per dose, while inpatient treatment can easily exceed $5,000. The core of any biosecurity protocol is not reaction, but proactive prevention through vaccination.
However, a common and heartbreaking scenario is a puppy contracting parvo despite having received one or two of its shots. This is not a failure of the vaccine itself, but a predictable biological phenomenon known as maternal antibody interference. Puppies receive temporary immunity from their mother through her milk (colostrum). These maternal antibodies are protective, but they also neutralize the vaccine virus, preventing the puppy from developing its own long-term immunity. These maternal antibodies wane over time, but the rate at which they do so varies from puppy to puppy. This creates a “window of vulnerability”—a period where the maternal antibodies are too low to provide protection but still too high to allow the vaccine to work effectively.
This is why a single puppy shot is not enough. As the American Veterinary Medical Association explains, if a puppy is exposed to the virus during this gap, it can become ill. To bridge this gap, a series of vaccinations is recommended, typically starting at 6-8 weeks of age and given every 3-4 weeks until at least 16 weeks of age. This strategy ensures that at least one of the vaccines is administered after the maternal antibodies have fallen to a non-interfering level, allowing the puppy to mount its own robust, long-term immune response.
Investing in a complete vaccination series is the single most effective and economical step you can take. It is the definitive action that transforms a high-risk puppy into a protected companion, rendering the expensive and difficult work of decontamination largely unnecessary.
Key Takeaways
- Parvovirus requires specific virucides like bleach or accelerated hydrogen peroxide with a strict 10-minute wet contact time; common cleaners are ineffective.
- Establish a biosecurity “airlock” at home entrances with foot baths and dedicated indoor/outdoor shoes to stop the spread of the virus via fomites.
- A full series of puppy vaccinations is critical to close the “window of vulnerability” caused by maternal antibody interference.
Distemper and Adenovirus: Why These “Invisible” Diseases Still Kill?
While canine parvovirus is often the most feared disease for a new puppy owner, it is only one component of a larger landscape of infectious threats. A comprehensive biosecurity and vaccination strategy must account for other highly contagious and often fatal diseases like canine distemper and adenovirus. These “invisible” diseases may not have the same public profile as parvo, but they remain a persistent danger to unvaccinated dogs. Fortunately, modern veterinary medicine provides an elegant and effective solution: the combination vaccine.
The standard puppy vaccination, often referred to as the DHPP or DAPP vaccine, is a powerful tool in your prevention arsenal. According to the AVMA, the DHPP vaccine protects against four diseases in one vaccine: Distemper, Adenovirus (types 1 and 2), and Parainfluenza, in addition to Parvovirus. This combination approach provides broad-spectrum protection against the most common and dangerous infectious diseases a puppy is likely to encounter. Opting for this combination vaccine is a foundational step in responsible dog ownership.
From a decontamination perspective, the good news is that a robust protocol designed for parvovirus is often effective against other viruses as well. Parvovirus, being a non-enveloped virus, is one of the hardest to kill. Therefore, a disinfection protocol that uses EPA-registered virucides effective against non-enveloped viruses, such as accelerated hydrogen peroxide or bleach solutions with a 10-minute contact time, will also be effective against enveloped viruses like canine distemper. Implementing an “all-hazards” disinfection plan ensures you are not just targeting one threat, but creating a broadly biosecure environment.
An all-hazards protocol includes:
- Using EPA-registered virucides proven effective against non-enveloped viruses for all cleaning.
- Applying an accelerated hydrogen peroxide or 1:32 bleach solution to all at-risk surfaces.
- Strictly maintaining a 10-minute wet contact time for all disinfectants to ensure efficacy.
- Cleaning and disinfecting all areas twice before considering them safe for reintroduction of animals.
- Implementing strict personal protective equipment (PPE) protocols for anyone handling animals or cleaning contaminated areas.
By combining a comprehensive vaccination schedule with an all-hazards disinfection protocol, you build a resilient biosecurity shield. This protects your puppy not only from the immediate threat of parvovirus but also from the host of other invisible dangers that still pose a risk to the vulnerable.