The most common grooming injuries are not caused by the wrong tool, but by the wrong technique, turning well-intentioned brushing into a painful experience.
- The angle and pressure you apply are more critical than whether you use a slicker or a rake.
- Mats should never be cut with scissors, and dry brushing causes static and coat damage.
Recommendation: Master the core techniques of line brushing, using a conditioning mist, and inspecting your tools for wear to prevent skin damage and rebuild trust with your dog.
You bought the brush the pet store recommended. You watch videos, you try to be gentle, but you still find yourself pulling on knots, and your dog flinches. Worse, you finish a session and notice red, irritated skin—brush burn. It’s a frustrating and guilt-inducing experience, especially when you’re only trying to care for your companion. The common advice to “brush regularly” and “get the right tool for the coat” is true, but it’s dangerously incomplete. It overlooks the single most important factor that separates a professional groomer from a well-meaning owner: technique.
The vast majority of at-home grooming injuries happen not because the tool is inherently bad, but because its mechanics are misunderstood. A de-shedding tool is designed for undercoat extraction, not for scraping along the skin. A slicker brush is for fluffing and separating, not for digging into the epidermis. Many owners are, without realizing it, using these tools in ways that guarantee discomfort and can even lead to serious injury.
This guide changes the focus from the ‘what’ to the ‘how’. We will move beyond the simple slicker versus rake debate and dive into the professional principles of tool handling, pressure control, and coat science. You will learn not just which tool to pick up, but how to hold it, how to move it across your dog’s body, and how to read the signals your dog’s coat and skin are giving you. By understanding the mechanics behind the methods, you can prevent pain, effectively manage shedding and mats, and transform grooming from a dreaded chore into a safe and bonding experience.
This article will provide a detailed, technique-focused breakdown of essential grooming tasks. Explore the sections below to master the professional methods that protect your dog’s skin and coat.
Summary: Slicker vs. Rake: The Professional’s Guide to Safe Dog Grooming
- The Furminator Risk: How to Avoid Cutting the Guard Hairs?
- Scissors vs. Clippers: Why Cutting Mats Is Dangerous?
- Curly vs. Double Coat: Who Needs Daily Line Brushing?
- Dry Brushing Static: Why You Should Always Use a Mist?
- To Pluck or Not: The Current Vet Consensus on Hairy Ears
- The Blow Coat Season: Managing Shedding Without Shaving
- When to Replace a Post: The Shredded Rope Signal
- Why Treating Only the Pet Fails to Stop a Flea Infestation?
The Furminator Risk: How to Avoid Cutting the Guard Hairs?
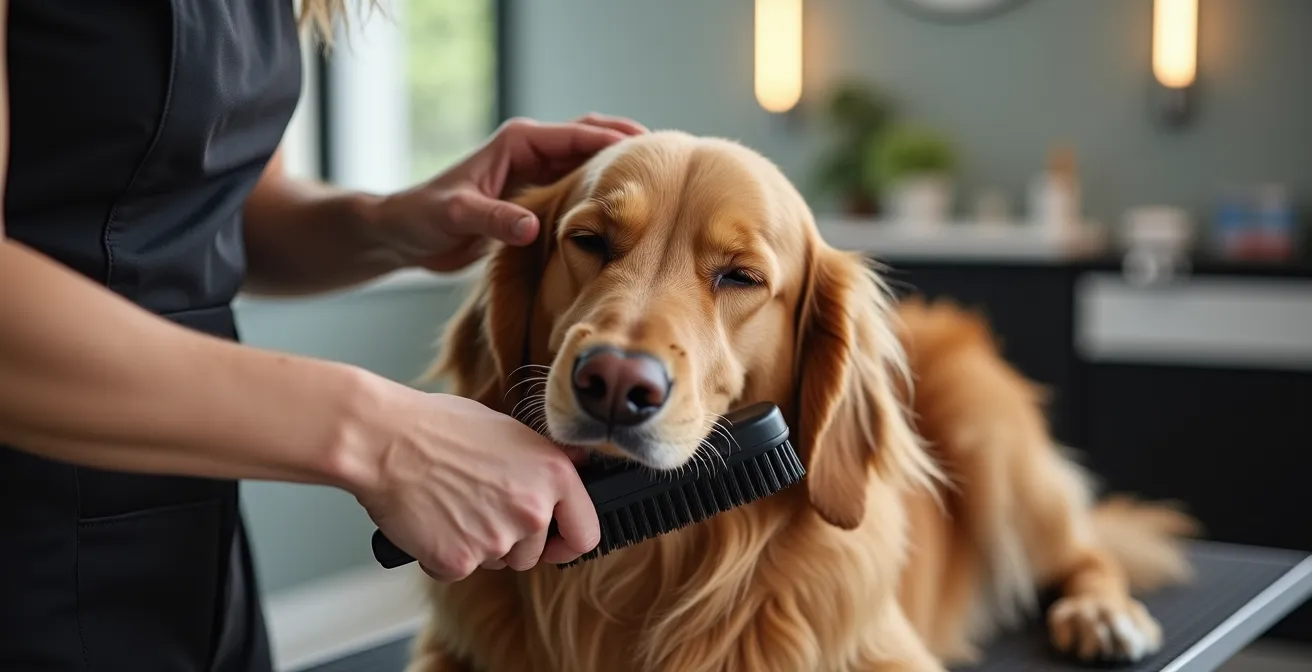
De-shedding tools, often known by the brand name “Furminator,” are incredibly effective at removing loose undercoat. However, their design—a fine-toothed blade—makes them one of the most misused tools in at-home grooming. The primary risk is not just skin irritation but also damaging the protective topcoat. The coarse, glossy outer hairs, known as guard hairs, are essential for protecting your dog from sun, rain, and environmental damage. When a de-shedding tool is used with too much pressure or at the wrong angle, its blade can break or cut these vital hairs, leading to a dull, patchy, and unhealthy coat.
The goal is to let the tool’s teeth glide through the topcoat and hook only the loose, dead undercoat. It should feel like combing, not raking. If you are putting enough pressure to scrape the skin, you are doing it wrong. In fact, veterinary emergency data shows that improper grooming is a significant source of harm, with one report indicating that 42% of dogs experience minor injuries during grooming. To use these tools safely, focus entirely on technique. Use short, light strokes that follow the direction of hair growth. Never drag the tool across the skin; lift it after each stroke. The moment you see long, shiny guard hairs in the tool, stop immediately. You are either using too much pressure or have already removed all the loose undercoat from that area.
Think of it as harvesting ripe fruit, not clear-cutting a forest. You only want what’s ready to come out. By focusing on a light touch and the correct angle, you protect the coat’s essential structure while effectively managing shedding.
Scissors vs. Clippers: Why Cutting Mats Is Dangerous?
When an owner discovers a tight, pelted mat on their dog, the first instinct is often to grab a pair of scissors and try to cut it out. This is one of the most dangerous things you can do. A mat forms when shed hair tangles with live hair, pulling tightly on the skin. Over time, this constant pulling restricts blood flow and can even pull the skin itself up into the base of the mat. When you try to slide scissors underneath, it is almost impossible to tell where the mat ends and the delicate epidermis begins. The result is often a severe laceration requiring emergency veterinary care.
Clippers are a safer option, but only in the hands of someone trained to use them on matted coats. The safest approach for a severely matted dog is always a professional shave-down. A groomer uses specific blades and techniques to get under the mat without catching the skin. For minor mats that are still loose, a de-matting tool or a metal comb can be used, but never scissors. The “metal comb test” is a professional’s go-to: if you cannot easily slide a fine-toothed metal comb between the mat and the skin, it is not safe to address at home.
Case Study: Hematoma Development from Mat Removal
When tight matted hair is removed from a dog’s ear, the sudden rush of blood flow back to the deprived tissue can cause capillaries to burst, creating a painful blood-filled swelling (hematoma) that often requires surgical intervention. Professional groomers report this as one of the most common mat-related injuries, particularly in dogs with long, floppy ears.
The risks associated with improper mat removal are significant and can lead to more than just cuts. Understanding the safe and unsafe methods is non-negotiable for any dog owner, as this comparative analysis from grooming professionals clearly shows.
| Method | Safety Level | When to Use | Risk Factors |
|---|---|---|---|
| Professional Shave-down | Highest | Severe matting close to skin | None with proper technique |
| Metal Comb Test | High | Before attempting removal | Minimal |
| Dematting Tool | Medium | Loose mats only | Can cause brush burn |
| Scissors | Low | Never recommended | High risk of cutting skin |
Curly vs. Double Coat: Who Needs Daily Line Brushing?
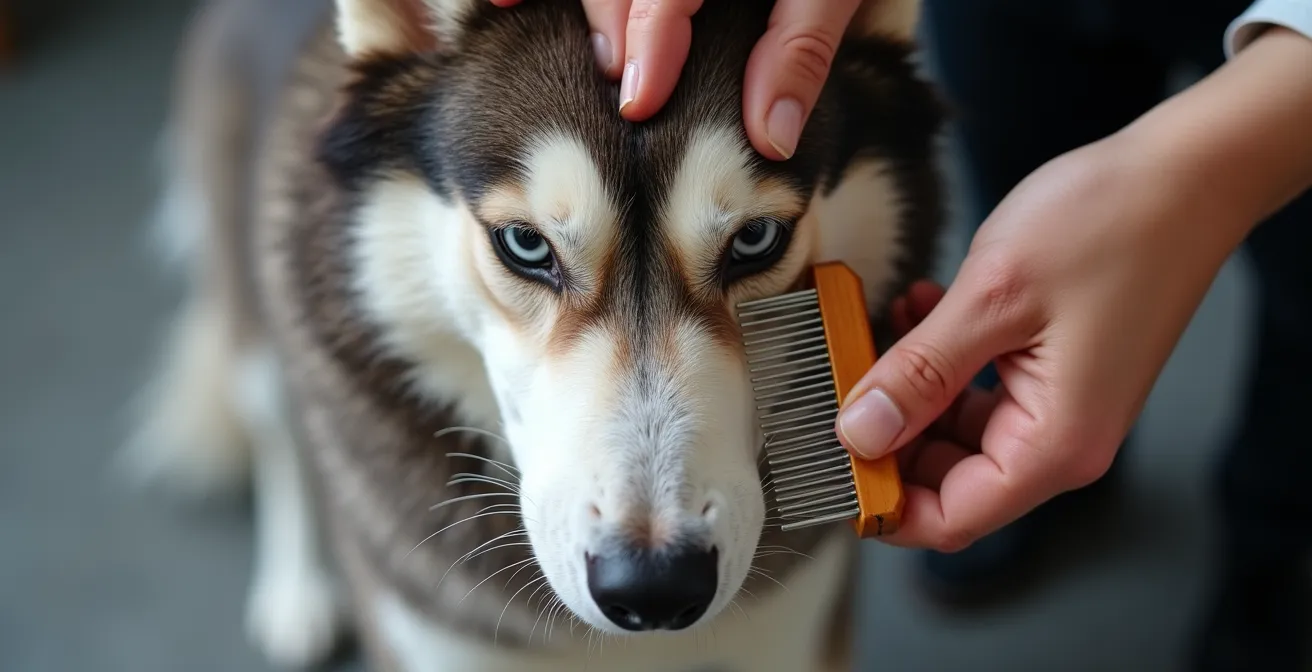
“Brush your dog daily” is generic advice that doesn’t account for different coat needs. While a short-haired Beagle might only need a weekly curry, breeds with dense undercoats (like Huskies, German Shepherds) or continuously growing hair (like Poodles, Doodles) require more intensive maintenance to prevent matting deep within the coat. For these breeds, the gold-standard professional technique is line brushing. This methodical approach ensures you brush every single hair from skin to tip, leaving no tangles behind.
Line brushing is not about randomly running a brush over the top of the coat. It’s a systematic process. You part the hair in a horizontal line, hold the hair above the line up with one hand, and brush the hair below the line down and away. You work in small sections, creating a new part about half an inch above the last one, and repeat. This ensures you are reaching the base of the coat where mats begin. After brushing a section with a slicker, you must follow up with a metal comb—the “inspector” tool. If the comb glides through smoothly, you can move on. If it snags, you go back to the slicker brush on that spot. This guarantees a truly thorough groom.
For double-coated breeds, line brushing is essential during shedding season to remove packed undercoat and prevent hotspots. For curly and drop-coated breeds, daily or every-other-day line brushing is a non-negotiable requirement to prevent the formation of mats that can lead to painful skin conditions. It’s a commitment, but it’s the only way to properly maintain these beautiful but demanding coat types.
Dry Brushing Static: Why You Should Always Use a Mist?
Have you ever noticed that brushing your dog’s dry coat seems to create more flyaways and that the brush seems to drag and pull? This isn’t just your imagination; it’s physics. Brushing a dry coat generates static electricity, which causes individual hairs to repel each other, creating frizz and making them more prone to tangling. More importantly, the friction from dry brushing can cause real discomfort for your dog and lead to coat breakage.
Professional groomers never brush a completely dry coat. They always use a light mist of a conditioning or brushing spray first. This isn’t just to make the coat smell nice; the spray’s primary job is to eliminate static and provide “slip.” This slip reduces friction between the brush and the hair shafts, allowing the tool to glide through the coat instead of dragging. This simple step prevents the painful pulling that can make a dog fear the brush and significantly reduces the risk of breaking healthy hair.
You don’t need to saturate the coat. A fine, light mist is all that’s required. Look for a professional-grade grooming spray specifically formulated for dogs. These products are designed to be hypoallergenic and have the correct pH balance (typically 7.0-7.5) for a dog’s skin, ensuring they won’t cause irritation. Using a mist is a small change in routine that makes a massive difference in your dog’s comfort and the health of their coat. It turns brushing from a friction-filled battle into a smooth, pleasant experience.
To Pluck or Not: The Current Vet Consensus on Hairy Ears
For decades, the standard advice for breeds like Poodles and Schnauzers was to pluck the hair from inside their ear canals to improve airflow and prevent infections. However, the veterinary consensus on this practice has shifted dramatically. Most veterinarians and professional groomers now advise against routine ear plucking. The reason is simple: plucking creates micro-wounds in the delicate skin of the ear canal. These tiny open wounds can become a breeding ground for bacteria and yeast, potentially causing the very infections the practice was meant to prevent.
The modern approach is reactive, not proactive. Hair should only be removed from the ear canal if a dog has a documented history of recurrent ear infections and a veterinarian has confirmed that the hair is a contributing factor. For the vast majority of dogs, even those with hairy ears, the hair is protective and should be left alone. It acts as a natural barrier, helping to keep debris and parasites out of the ear canal.
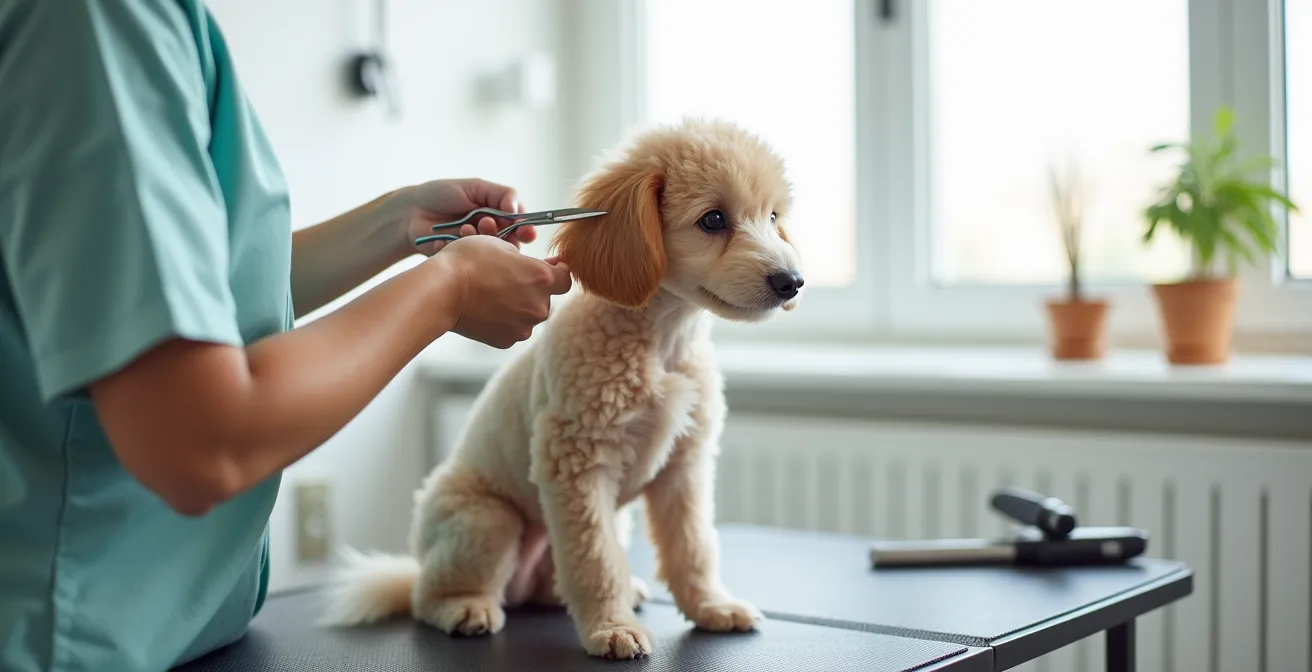
So, what is the safe alternative for keeping the ears tidy? The best practice is to simply trim the hair that is growing out of the ear opening so it sits flush with the ear. This should only be done with blunt-nosed or rounded-tip scissors to prevent any risk of poking or cutting the ear. This technique maintains a neat appearance and improves airflow slightly without causing the trauma associated with plucking. Combined with regular ear cleaning using a vet-approved solution, this method maintains ear health without creating unnecessary risks.
The Blow Coat Season: Managing Shedding Without Shaving
Twice a year, many double-coated breeds like Golden Retrievers, Pomeranians, and Bernese Mountain Dogs go through a “blow coat” season. This is when they shed their dense undercoat in massive clumps to prepare for the changing weather. The sheer volume of fur can be overwhelming, tempting some owners to ask for their dog to be shaved down. However, shaving a double-coated breed is extremely detrimental. It removes their natural insulation against both heat and cold and exposes their skin to sunburn, while also permanently damaging the texture and regrowth pattern of the guard coat.
The professional solution to a blow coat is not removal, but management. The most powerful tool in a groomer’s arsenal for this job is the high-velocity (HV) dryer. An HV dryer doesn’t just dry the coat; it blasts out loose, dead undercoat with incredible efficiency. By working systematically against the direction of hair growth, a groomer can remove the vast majority of shedding fur in one session, a feat that would take hours of manual brushing. This process not only de-sheds but also exfoliates the skin and separates any minor tangles before they can become mats.
While an HV dryer is a professional tool, a thorough de-shedding routine at home can achieve similar, if less dramatic, results. The key is using the right tools in the right order. Start with an undercoat rake to break up the dense clumps, follow with a slicker brush using the line-brushing technique to remove more fur, and finish with a metal comb to catch any remaining loose hairs. This multi-tool approach is far more effective than relying on a single brush. As this effectiveness breakdown from the American Kennel Club demonstrates, different tools have different strengths.
| Tool | Effectiveness | Best For | Frequency |
|---|---|---|---|
| High-Velocity Dryer | 95% undercoat removal | All double-coated breeds | Weekly during peak shed |
| Undercoat Rake | 70% removal | Thick undercoats | 2-3 times weekly |
| Rubber Curry | 60% removal | Bath prep | During every bath |
| Slicker Brush | 40% removal | Daily maintenance | Daily |
When to Replace a Post: The Shredded Rope Signal
While the phrase “shredded rope signal” typically applies to a cat’s scratching post, it serves as a powerful metaphor for dog grooming tools. A frayed, worn-out tool is not just ineffective; it’s dangerous. Recognizing the signs of wear is a critical, often overlooked, safety measure. Bent pins on a slicker brush, a cracked rubber cushion, or a dull de-shedding blade dramatically increase the risk of injuring your dog. A worn tool forces you to apply more pressure to get the same result, leading directly to brush burn and coat damage.
Every tool has a limited lifespan. Slicker brush pins bend over time, creating sharp points that can scratch the skin. The rubber cushion they are set in can dry out and crack, causing the pins to sit at an improper, rigid angle. Rakes and combs can lose teeth or develop sharp burrs on the metal. Perhaps most importantly, the blades on de-shedding tools become dull with use. As one expert points out, this is a significant safety concern.
A worn-out de-shedding blade becomes dull and less effective. This causes the user to apply more pressure, dramatically increasing the risk of brush burn and of breaking the topcoat instead of removing the undercoat.
– Professional grooming equipment specialist, Chris Christensen Grooming Tools Guide
You must inspect your tools before every single grooming session. Run the brush over the sensitive skin of your inner forearm—this is the “Scrape Test.” If it feels scratchy or uncomfortable to you, it will be painful for your dog. A high-quality slicker brush may only last 12-18 months with regular use before it needs to be replaced. Investing in new tools is not an upsell; it’s a fundamental part of a safe grooming protocol.
Your Brush Wear Safety Checklist: When to Replace Your Tools
- Perform the ‘Scrape Test’: Gently scrape the brush on your inner forearm to feel for sharpness.
- Check for bent or missing pins on slicker brushes weekly.
- Inspect the rubber cushion for cracks, brittleness, or deterioration.
- Look for broken or bent teeth on rakes and combs.
- Test the sharpness of a de-shedder blade on a piece of paper; a dull blade will tear, not slice.
- Deep clean all tools with diluted vinegar or a proper disinfectant monthly to remove oils and debris.
- Plan to replace slicker brushes every 12-18 months with regular professional or home use.
Key Takeaways
- Tool selection is secondary to proper technique; your angle and pressure are what prevent injury.
- Never use scissors on mats; skin can be pulled into the tangled hair, leading to severe cuts.
- Dry brushing causes static, leading to painful pulling and coat breakage; always use a conditioning mist.
Why Treating Only the Pet Fails to Stop a Flea Infestation?
A flea comb is an essential grooming tool, not just for removing fleas but for detecting an infestation early. However, if you find fleas on your dog, simply treating the dog is a guaranteed recipe for failure. The fleas you see on your pet are just the tip of the iceberg. They represent the adult stage of the flea life cycle, but the vast majority of the problem is hiding in your home. In fact, comprehensive research shows that only 5% of fleas are on the pet, while the remaining 95% of the flea population—the eggs, larvae, and pupae—lives in the environment.
These immature stages thrive in carpets, bedding, floorboards, and furniture. A single female flea can lay up to 50 eggs per day, which fall off your dog and into your home. These eggs hatch into larvae, which then spin a cocoon to become pupae. The pupae are incredibly resilient and can lie dormant for months, waiting for the right signal (like the vibration or warmth of a passing host) to hatch and jump onto your pet, starting the cycle all over again. If you only treat the dog with a spot-on or a pill, you are only killing the adults, allowing the environmental population to continually re-infest them.
A successful flea eradication plan requires a three-pronged attack: treat the pet, treat the home, and treat the yard. This means using a veterinarian-recommended preventative on all pets in the household, thoroughly vacuuming all floors and furniture daily (and disposing of the bag), and washing all bedding in hot water. Grooming plays a crucial supportive role in this process.
Case Study: Post-Infestation Grooming Protocol Success
Professional groomers report that implementing a specific post-treatment grooming protocol significantly reduces re-infestation rates. This includes a medicated bath to soothe irritated skin, a thorough comb-out with a fine-toothed metal flea comb to remove dead fleas and debris, followed by the application of a preventative topical treatment. Groomers note this protocol helps prevent secondary skin infections from excessive scratching in up to 80% of cases.
By applying these professional techniques consistently, you can move past the frustration of causing accidental harm and transform grooming into a safe, effective, and positive routine that strengthens the bond you share with your dog.
Frequently Asked Questions About Slicker vs. Rake: Why Using the Wrong Brush Hurts Your Dog?
Should I routinely pluck my dog’s ear hair?
Modern veterinary consensus recommends against routine plucking as it creates micro-wounds that can cause infections. Only pluck reactively for dogs with documented recurrent ear infections where hair is a confirmed factor.
What breeds are most affected by ear hair issues?
Poodles, Schnauzers, and other breeds with continuously growing coat types, though individual assessment is more important than breed alone.
What are safe alternatives to plucking?
Trim hair flush with the ear opening using blunt scissors, and use veterinarian-approved drying ear powders to maintain a healthy ear environment.